
How to Use an External Microphone with a GoPro Fusion or GoPro Max
(Or the Insta360 One X…or many other 360 cameras for that matter)
You just bought that shiny new GoPro Max and you want to record a realtor talking on the beach patio for an oceanside 360 video shoot, but the ocean is overpowering the realtor’s voice in the GoPro mic. Or maybe you’re trying to record a restaurant owner talking about their business on location, but the ambient noise prevents their voice from being heard clearly using the built in mics. Time to get your trusty external microph… oh wait, where does this thing plug in????
360 video cameras are unique in that they record video in all directions using 2 or more lenses, so the videos can be stitched together to create a 360 video. This means if you were to have cables coming out of the camera, they’d probably show up in the video. For this reason and whatever other reasons, your only option for recording high quality vocal audio (especially in places with lots of ambient noise) for many 360 cameras is to record with an external mic and a separate device with audio recording capabilities. This article takes a look at the steps involved with recording audio with a separate device, and then syncing it with the video taken by the 360 camera.
This page contains links to products, so if you find this site useful and use a link to make a purchase, I’ll get a small commission. As an Amazon Associate I earn from qualifying purchases. Enjoy!

Step 1) Find a device that can record audio (you probably already own one)
If you have a phone, you can probably record audio with it. Whether you have Apple’s iOS, Google’s Android, or something else relatively recent, there are multiple audio recording apps you can use on the various app stores.

Some of the audio recording apps available on Apple’s App Store.
Step 2) Get a wireless microphone system
You may already have a wireless mic system (transmitter & receiver), or you may be starting to look at options. When I recently recorded a 360 video in a bar with a host/narrator, I used the Rode Wireless Go mics, which are a great option. They are super lightweight and small enough that the narrator can just clip the transmitter/mic to their lapel, and you’re ready to roll. I have used these mics both with and without the optional Rode Lavalier Mic. In situations where you want to minimize ambient noise, I would opt for using a lavalier mic, but if you’re OK with a little ambient noise then you probably don’t need it (I recorded someone talking 20 feet from a busy road with just the basic Rode Wireless Go kit, and it allowed a little bit of the traffic noise in the background, but the person’s voice was clear). If you want to be safe, you could use the lavalier mic and you’ll still have the ability to add in ambient noise using the audio captured by the 360 camera once the audio is synced, which I’ll explain later in this article.
One thing to remember if using this system is to keep the receiver as close as possible to the transmitter/mic. Rode advertises them to work at “a line-of-sight range of up to 70m,” but if a person’s body or wall comes between the pair, the range can shorten significantly. In many cases, I will hide the Rode receiver (attached to my iPhone) in the 360 scene with the narrator where the camera can’t see it, rather than taking the phone with me and hiding around the corner of a wall. This minimizes the chance of audio intermittently cutting out.
In order to plug the receiver into my iPhone, I had to use an Apple Lightning to 3.5 mm Headphone Jack Adapter and a Rode SC7 3.5mm TRS to TRRS Patch Cable.
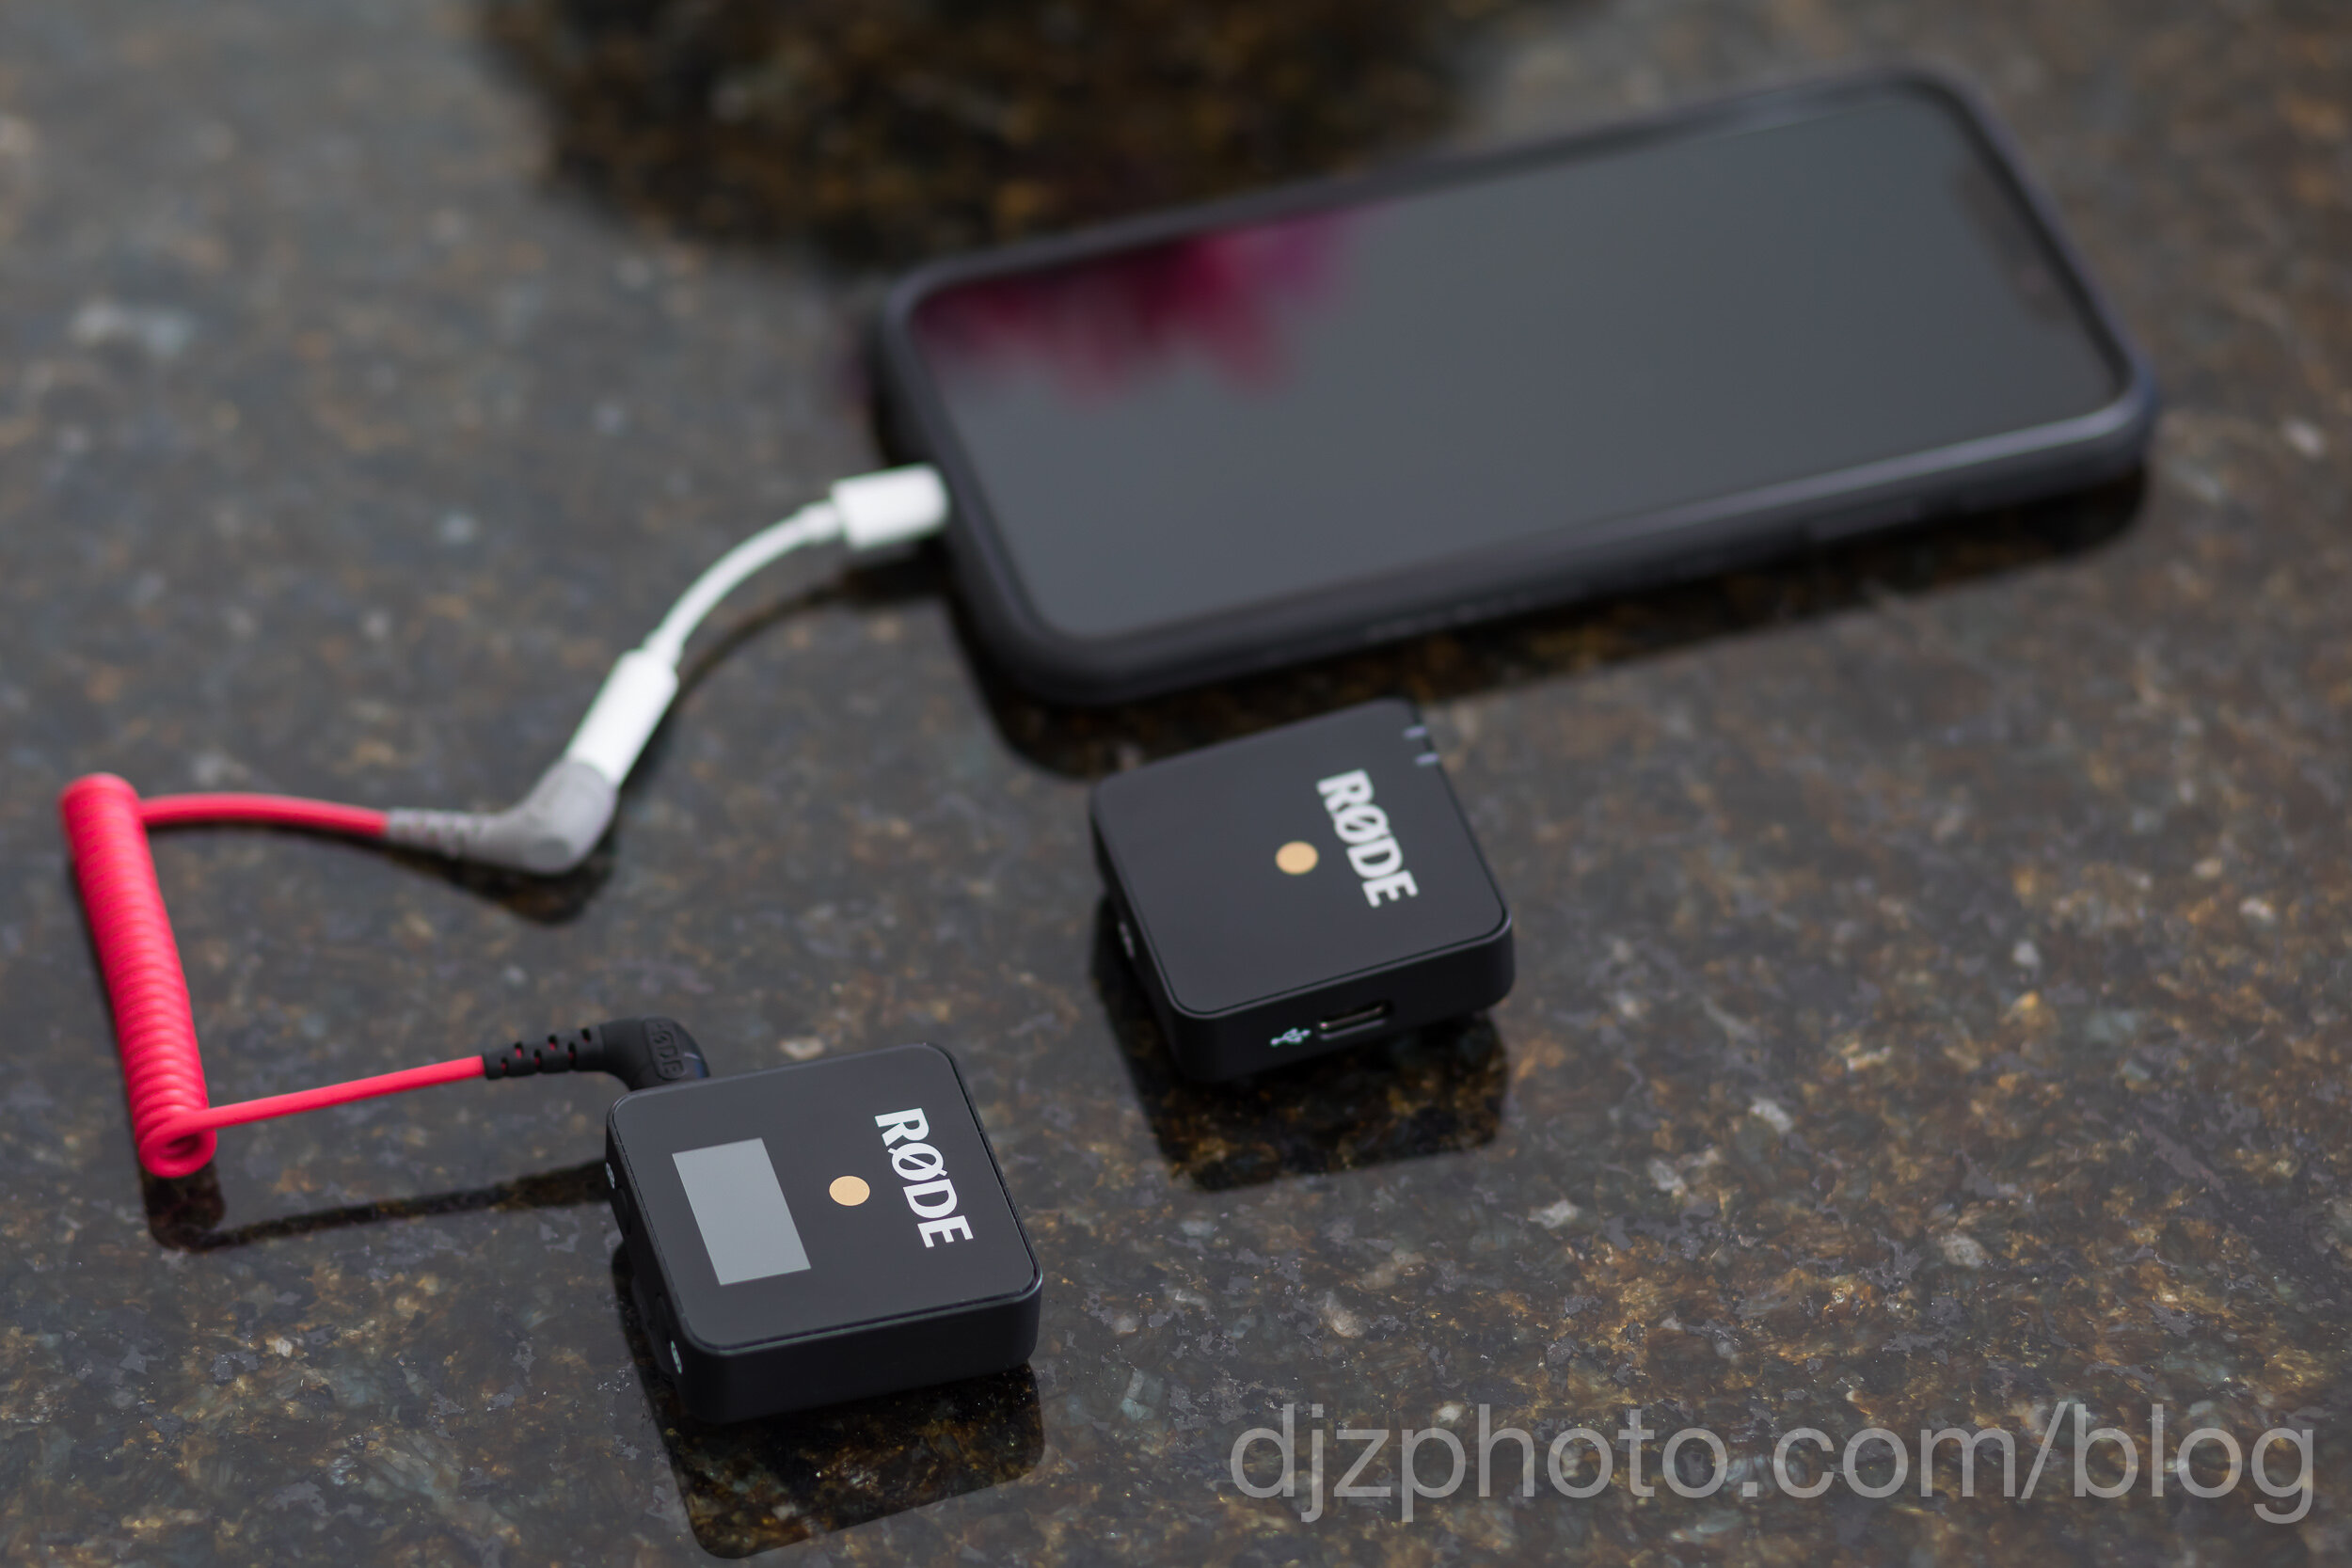
The Rode Wireless Go Microphone system, hooked up to an Apple iPhone.
Step 3) Start Recording
When you have your wireless mic system hooked up to your phone (or other recording device), you’re at the scene you want to shoot, and you or another narrator is ready to speak, it’s time to record! After pushing record on the 360 camera and also the smartphone, have someone clap near enough and/or loud enough to overcome other noise happening in the scene. Just a single clap will suffice… don’t applaud until your client mails you a check! =) This will give us a nice audio spike that will allow you to easily sync the audio in post-processing. To make it easier on yourself in post-processing, clap a single time before each video section, and before each take. Then you can trim out bad takes and manage your project easier in your favorite video editing app.
Step 4) Sync the audio to the video in your editing app
After you import your stitched 360 video in a video editing application like Final Cut Pro or Adobe Premiere, it’s time to sync the external mic’s audio with the 360 camera’s audio. If you add the external mic’s audio into your timeline, you can see graphically where your audio spikes are from somebody clapping before speaking:

Syncing Audio between an External Mic and a 360 Camera in Post-Processing
All you have to do is line them up, and then playback the video a couple times to make sure they are exactly aligned. You want the external mic’s audio track to be so perfectly aligned that it sounds like a single person clapping one single time. Repeat for each clip.
Once you have the audio tracks perfectly aligned, you can also decide how much audio you want from the camera to come through. For example, if you were recording audio next to the ocean, you could reduce the 360 camera’s audio track to 20% volume, rather than eliminate it completely. Or, if the narrator didn’t start talking right away, you could leave the camera’s audio at 100% and then fade it down as the narrator started speaking. As long as the audio tracks are perfectly aligned, you’ll have a lot of flexibility in regards to what the final video will sound like.
And that’s all there is to it! Hopefully that will give you a few helpful ideas about recording with a 360 camera and processing audio from external mics. Even if your scenario isn’t described here, hopefully it will give you a few ideas.
A Few 360 Camera Options

Insta360 One X2
5760 x 2880 Video, 6080 x 3040 Photos
*Note: They have an optional microphone adapter that allows for external microphone input, but you might end up with the mic in the 360 video if you attach it directly to the camera

GoPro Max
5376 x 2688 Video, 5760 x 2880 Photos

Ricoh Theta Z1
3840 x 1920 Video, 6720 x 3360 Photos

Ricoh Theta V
3840 x 1920 Video, 5376×2688 Photos